Showing posts with label vegetarian. Show all posts

Sunday, May 18, 2014

Breakfast Salad~Soft eggs with cherry tomato salad, sprouts and toast


On weekends I like to treat myself. I like to starting my mornings in a healthy way. The idea of salad for breakfast may seem a bit strange but it is a great way to get a jump start on getting those recommended daily servings of vegetables. On any given day it is a struggle for me to consume one measly cup of raw veggies. I find that when I start with salad for breakfast, it motivates me to make healthier eating choices throughout the day.

I must confess that my salads don't require a recipe. They are dictated by what's in season and what I happen to have on hand. Here is a rough guide for you to follow.


Cherry Tomato Salad with Sprouts and Toast
1 serving

Salad
1 tablespoon goats cheese crumbled
1 stalk chive, chopped
5 grapes, halved
5 black olives, halved
pinch of salt
pinch of black pepper
pinch of red pepper flakes


1 slice toast
1 tablespoon hummus
1 soft boiled egg
alfalfa sprouts (as much or as little as you like)


Mix all the salad ingredients together. Spread hummus on toast and serve with alfalfa sprouts.


Monday, March 10, 2014

Doubles

Is it truly a sacrifice to refrain from meat if you exchange it for a vegetarian dish this delicious?

Probably not. 

Lenten abstinence doesn't have to mean bland food but honestly this feels a little like cheating because it tastes so darn good. One of my favourite things to eat during Lent is doubles. Oh, who am I kidding, like most Trinidadians, I eat this religiously all through the year!

Doubles is the most widely available street food in Trinidad. It is a popular breakfast choice although it is not uncommon to have them for lunch, dinner or even as a snack. Just so you know, in Trinidadian vernacular the name 'doubles' is both singular and plural. That's right, you can have one doubles or two doubles. Yeah, I'll admit that sounds confusing but don't worry,  you won't care to argue the semantics once you've tasted them. Trust me, you will be too busy stuffing your face.

Trinidadians eat a lot of doubles. Perish the thought that you should find yourself in some remote corner of the island without access to a doubles vendor. We are so dedicated to getting our doubles fix that someone actually created an app to help satisfy our mad craving for this food. Using this app you can quickly locate the nearest doubles vendor no matter where in the country you might happen to be. I kid you not.

So what the heck is a doubles? Essentially, it is an adaptation of India's chole bhatura. Originally the channa filling (chole) used to be served with a single round soft bread (bhatura) at the side. Trinidadians call this soft, spongy textured bread bara. Over time, descendants of Indian immigrants made adaptations to the traditional chole bhatura, turning it into something that is distinctly Trinidadian. The chole or channa (chickpea) filling is topped with various condiments and served between not one but two bara (bhatura), hence the name doubles. Think of it as a spicy, vegetarian sloppy joe. 

On its own, the bara and channa can be somewhat bland and underwhelming. However the wizardry of doubles resides in the various chutneys and sauces which are added to the mix. Each vendor has his own signature blend of spicy condiments and it is these robust and piquant sauces which transform a cheap meal into a national addiction. 

Doubles isn't something that is often made at home. They are inexpensive and readily available everywhere so it is much easier to buy them than to prepare it yourself. Although it is fairly simple to make, it does but require a bit of advance planning to allow for the dough to rise and rest. 

Doubles
8 bara 
Serves 4

Bara
2 cups flour
3/4 tsp salt
1 tsp tumeric powder
1/4 tsp ground geera (cumin)
1/4 tsp sugar
1 tsp instant yeast
approx 1 cup lukewarm water ( or 1/4 cup more if needed) 
oil for frying

Combine flour, salt, tumeric, geera, sugar and instant yeast in a large bowl.
Add enough lukewarm water to make a soft dough. Mix by hand knead a few times to form a ball. Be careful not to overwork the dough. Brush the top of dough with 1 tsp oil. Cover and let rise for 1/2hrs

Punch down the dough. Knead it into a ball. Cover and let rest for 10-15mins. Shape dough into 8 balls. This dough tends to be soft and sticky. Moisten your hands with a little water or oil as you work the dough to prevent it from sticking your hands. Divide and shape into 8 round balls.

Flatten and stretch dough into a 4" or 5" circle. Use water or oil to on your fingers to moisten to prevent dough from sticking. 

Heat oil in a large deep pot and fry bara a few minutes on each side on medium high heat.


Channa Filling
2 tins channa
1 tbsp vegetable oil
3 cloves garlic, minced
1 onion, minced
2 tablespoons Chief Brand curry powder
1/2 tsp salt


Drain and rinse channa. Put channa in a large pot add water until barely covered and boil for about 10mins. Drain water from channa and set aside.

In a large heavy pot, heat oil. Add garlic and onion to the oil and fry until fragrant. Mix curry with about 1/8 cup of water and add it to the oil. Cook for a few minutes until most of the water has evaporated. Add channa and stir to coat well with curry. Use back of a large spoon to smash some of the channa.  Add more water to barely cover the channa. Lower heat and simmer until channa is mushy with a thick sauce. Taste and add more salt if needed.

Cucumber Chutney
2 large cucumbers
10 chardon béni leaves, minced
3 cloves garlic, minced
2 tsp lime juice ( or more to taste)
1/8 tsp brown sugar
1/2 tsp salt (or salt to taste)
1/2 scotch bonnet pepper, minced (optional)

Wash and coarsely grate cucumber. It doesn't need to be peeled but you can peel it first if you prefer. Place grated cucumber in a strainer and squeeze off as much of the water as you can. Place in a small bowl. Add all other ingredients and mix. 

Assemble the doubles by placing a spoonful of channa on a bara. Top with cucumber or other chutney, your favourite West Indian pepper sauce and cover with another bara. 

COOK'S TIP: Other popular toppings for doubles are mango chutney, chardon béni chutney, mango kuchela, tamarind sauce, and roasted coconut chutney.


Tuesday, March 4, 2014

Trinidad Fish Stew


I haven't been on this blog for a long while and I am almost but not quite sorry. I always miss blogging when I have been away from it but at times it is important to show up in other places of my life where I am needed a bit more. One of those places has been my garden. Long time visitors to this site may remember this dream of mine. I am happy to report that my journey to producing some of my own food is becoming more real. Perhaps one day soon some of the dishes on this blog might even showcase produce that I actually grew myself. 

Tomorrow is Ash Wednesday and after today's Carnival celebration many Trinidadians will be headed to mass to receive ashes. In keeping with Lenten tradition, many homes will prepare a meal of fish.  

This stewed fish recipe is a favourite of mine and in many homes it is often served with cou cou. Trinidadians usually fry the fish first before adding it to a tomato based stew. When this done, it is called by the odd name of Stew Fry Fish to distinguish it from the version where the fish is not fried but added directly the sauce. My preference is to fry first.

Trini Stew Fry Fish
1lb fish (bangamarie)
* other fish like flying fish, king fish, carite, carvali, tilapia can be used

4 tablespoons green seasonings
1 tsp salt
juice of one lime
1  cup flour
oil for frying

Golden Ray cooking margerine or butter
4 goves garlic minced
2 large onions, sliced
3 medium tomatoes sliced
1 bay leaf
1/2 cup ketchup
1/2 tsp mustard
1 teaspoon sugar
1/2 cup water
1/2 teaspoon curry powder
1/2 teaspoon West Indian pepper sauce (optional)
8-10 Trinidad pimento peppers seeded and finely sliced


Season fish with salt, lime juice,  and green seasoning. Leave in fridge to marinate for 30 minutes. Mostly I do this the night before so that when I get home from work the fish is ready to be cooked. If seasoning the fish overnight I will omit the lime until just ready to cook.

Heat enough oil for deep frying the fish in a large pot on medium high heat. Fry the fish and set aside on paper towels.

Once all the fish has been fried, melt the butter  in a large and fairly deep skillet with a tight fitting lid..

To the butter,  add the curry, garlic, onions, tomatoes, celery, and cook until nicely fragrant. Add the ketchup, mustard, sugar, water, bay leaf and stir to combine. Bring sauce to a simmer.

Add the fish and pimento peppers to the sauce, cover and simmer about 5 minutes just until the fish is warmed through. Taste and adjust salt if necessary.


Sunday, December 15, 2013

3 Vegan Recipes that pack some punch

Food bloggers spend a lot of time reading other blogs for inspiration. I met vegan / raw food blogger when she contacted me to have me create a photo for her recipe book The Joy of Raw and Vegan Cooking which is available now on Amazon. Follow the link to preview her book which features some beautiful photographs. Also, you will not be disappointed to discover Shernell's blog where she shares her passion for raw food.

I am not vegan but I am always concerned about healthy eating. Often,  I will include vegan or vegetarian meals on my table. Shernell  now resides in New York but her food is still big on island flavour which everyone is sure to enjoy. Hers is one of the blogs that I turn to when I am looking for vegan inspiration with a West Indian twist. Over now to Shernell......


Hello all you readable feast lovers out there! My name is Shernell, and I’m a passionate vegan cook from the island of Barbados. I love making all my food from scratch, however I believe in simple, easy to find ingredient recipes. I have been invited here to share three of them from my new cookbook The Joy of Raw and Vegan Cooking with you. So enough with the long talk and enjoy.

First up I have a recipe that has been known to turn meat eaters into vegans. Flavor is everything when cooking any meal, vegan or not. These cauliflower steaks are dripping with succulent barbeque flavor.


Barbeque Stewed Cauliflower

If you’re new to raw and vegan foods and you miss meat, this easy recipe is for you.

1 tablespoon salted barbeque spice mix
2 tablespoons olive oil
2 sundried tomatoes
½ red bell pepper
1 tablespoon maple (or agave) syrup
½ lemon juice
3 tomatoes
1 head of cauliflower cut into medium florets

Blend the first seven ingredients in your blender and then pour over the cauliflower florets.
Mix the sauce into the florets well and put into a roasting pan.
Roast for 30 minutes or until the cauliflower is tender and then serve.

If your barbeque spice mix isn’t salted, add 1 teaspoon of salt ( or salt to your taste)  to the recipe. 


Second up we have the best tasting green smoothie ever made. That’s right, Shernell says so.  It makes for a great meal replacement.


Best Green Smoothie

I made this recipe over one hundred times; it is so delicious and easy to make.


2 cups fresh organic spinach
3 frozen bananas
1/3 cup cashews
¼ teaspoon salt
3 tablespoons of maple ( or agave )syrup 
1 cup water

Blend and serve. Makes about three cups.


If you take your time to make this recipe you will be in cake heaven, guaranteed. Yes I did save the best for last. 


Chocolate Hazelnut Mousse Tart

No Exaggeration, this is the absolute best raw dessert I have ever had hands down. Please make it and prove me right. It’s light and airy with smooth chocolate and hazelnut flavor.

Crust
1 cup cashews
1 cup almonds
2 tablespoons of chocolate powder
¼ teaspoon of salt
7 medjool dates
½ teaspoon of vanilla extract

Process the first 4 ingredients in your food processor until flour like then add in the dates and vanilla extract and process until the mixture sticks together.

Press the pie crust into a 10-inch removable bottom tart-pan and place it in the freezer.


Filling

The meat of two young Thai coconuts
11/2 cups coconut water
1/3 cup cashews
1/3 cup of chocolate powder
1/3 cup maple ( agave ) syrup
¼ teaspoon of salt

Blend all the ingredients until creamy and place in the refrigerator in a medium bowl.

Hazelnut Topping


¼ cup of hazelnuts
¼ cup of cashews
2 tablespoons of chocolate powder
1/2 cup of maple syrup
2 teaspoons of coconut oil
1 teaspoon of vanilla extract
¼ teaspoon of salt
1 cup of hazelnuts


Blend the first 7 ingredients in you blender until creamy then set it aside.

To assemble the tart, pour the filling over the crust then pour the topping on and
evenly spread 1 cup of hazelnuts over the tart.

Freeze for 3 hours and serve. Its lasts for one week in the freezer, but trust me, it won’t
last that long.

Have a happy and healthy holiday.

To find out more about Shernell Cooke, visit her at her blog The Raw Food Beginner Chef.  You can also purchase her book The Joy of Raw and Vegan Cooking on Amazon or Barnes and Nobel

Monday, August 26, 2013

Fat Pork Jam


It has been a fruitful holiday. We have been stuffing our faces with mangoes, West Indian cherries, yellow plums, and guavas. Wars are being fought over the few remaining sugar apples. 


One  uncommon fruit which we found on a drive through the country side was fat pork.  Bite into it and the unusual texture of it's interior, white pulp will clue you in as to the name. The taste is insipid and to be honest it doesn't inspire a second bite. It looks it but doesn't taste like pork fat. The weird, floury texture is only very mildly sweet with a flavour that is barely detectable. The rest of the Caribbean calls these fruit cocoplums. It is something that I remember foraging as a child, although now I cannot for the life of me remember why! 


Foraging, apparently it's a thing. Back when I was a child. It didn't have a name. It was just something we did. Mom and Dad you might want to look away for this part. Sampling little bits of wild, edible, plants and their fruits was a childhood game which was meant to gross out friends. 

Does anyone remember eating the transparent seed coat of the Pride of Barbados seeds? We called it Dead Man's flesh. Yum. There is that 'ick' factor that's so gosh darn appealing to kids~ especially boys.  Reportedly, all parts of the Pride of Barbados plant are toxic but we didn't know that as children. It's a wonder any of us survived childhood! How about sucking the nectar out of the Ixora flowers or eating 'cheese' (pollen) from the stamen of hibiscus flowers? So tell me are there any strange things which you ate as a child that have you questioning your sanity today?

Back to present day and the point of me buying a large quantity of a fruit that my son says tastes like mashed potatoes. 

He is not wrong.
I don't much care for it myself but I had heard that one could use this fruit to make jam. 

How was it? Well, we all liked it. While not likely to replace our all time favourite strawberry or guava jams, it was pretty decent jam.  I would describe it as having a mild rose flavour with slightly woodsy notes.  Part of me wants to call this by its other name and say cocoplum jelly. That sounds a lot more sophisticated and grown up, doesn't it? However the kid in me...

I can't help myself - the shock factor of offering someone a spoonful of Fat Pork Jam is proving to be just too irresistible. 


Fat Pork Jam
(yield about 1 cup)
*No actual pigs were harmed in the making of this jam.

Ingredients
75 fat pork (cocoplums)
2 tsp lemon juice
1/4 tsp cinnamon
1 cup sugar

Method
Put the fat pork into into a deep pot filled with water ~ just enough to cover the plums. Boil for about 3 mins. . After allowing it to cool, use clean hands  to smash the fruit and remove the seeds. Pass the remaining pulp through a sieve removing the larger bits of pulp and skin. To this fruit sludge, add 2 tsp lemon juice, 1/2 tsp of ground cinnamon and 1 cup of sugar. Cook until jam is set. Click here for useful tips for knowing when your jam is ready 

Wednesday, July 17, 2013

How to make microwave Cou-Cou (Trinidad Coo-Coo)

What's better than cou cou with stewed fish? Cou cou that doesn't need stirring until it feels like your arm is about to fall off, that's what.

What's the worse thing a friend can tell you when you have been proven wrong?

I told you so!

Yes Cynthia my friend feel free to unleash the three most annoying words in the english language at me.

You really did tell me so.

Cou cou, is the Caribbean version of polenta. Paired with flying fish, it is the national dish of Barbados but it is made all across the region. The traditional way of making this cou cou involves a lot of stirring with a stick that looks like this

As the liquid is absorbed into the cornmeal the entire thing stiffens up and gets very heavy. Turning it becomes a tiresome process. 

About 5 years ago my good friend Cynthia gave me a tip for preparing cou cou in the microwave. It takes just ten minutes and you can avoid the arm workout because it's so easy to do.

I was skeptical and promptly ignored her.

You will forgive me but I have deep seated ill feelings towards microwave ovens, borne out of past experiences where food basically tastes like rubber. However my recent success with making lemon curd in the microwave made me think that I should give Cynthia's suggestion a try. Am I ever glad that I did.  


Trinidadian Cou Cou
(adapted from Cynthia Nelson)

butter ( for greasing bowl)
1 cup fine cornmeal
1/2 tsp salt
2 tablespoons Trinidad pimento peppers (chopped)
1 tablespoon bell peppers
1 tsp onion powder ( or one tablespoon finely chopped onions)
1 cup okra (thinly sliced or chopped fine according to your preference)
1 cup coconut milk
2 cups water 

Method
Butter a pyrex bowl (approx 9-10" diameter) generously and put aside.
Add all ingredients to a mixing bowl and stir to mix everything together.

Pour the mixture into the buttered pyrex bowl and place in the microwave.
Set the microwave on high and cook for 6 minutes.

At the end of the 6 minutes use oven mitts to remove the bowl from the microwave. Be careful the bowl will be hot.Stir the mixture well folding the top over into the bottom and evening out any lumps. Place the bowl back into the microwave and cook for 4 minutes.

Remove from the microwave. Smear a pat of butter across the top and leave it at least 15 minutes to firm up before serving. After it is cooled turn the bowl upside down and unmold the cou cou onto a serving plate and slice to serve.

COOKS TIP: This recipe is for a Trinidadian style cou-cou which is different from a Bajan (Barbadian) cou-cou. Trinis mostly use coconut milk for their cooking liquid in cou cou while other islands do not. Trinidadian's also like to see a colourful cou cou hence the use of red and green peppers. Some people also include grated carrots.


Tuesday, July 9, 2013

Omelette with Greens and Pommerac


This morning I made this super simple breakfast. It may not seem like much but for me it is quite the deal since breakfast is a meal I usually skip. Now that I am on a spiritual rejuvenation of sorts, i.e. vacation, I find myself wanting to rejuvenate my physical self as well. As such, I am making it my goal to improve on how I start my days. 


Luckily this is not going to be too hard to do since a couple of the fruit trees in my yard are bearing heavily. Right now our pommerac tree is making a spectacular showing. Without a doubt this fruit is set to be a regular feature at my table over the next month. 


Red Pepper Omelette
(serves 4)

8 eggs 
1/8 cup onions (chopped)
1/8 cup red bell peppers
1/8 cup Parmesan cheese ( or any cheese of your choice, grated)
salt to taste
1 tsp oil

watercress
pommerac (sliced)
choi sum flowers

METHOD:

Crack the eggs into a small bow. Whisk with a fork. Add chopped onion and red bell pepper. Season with salt and whisk a bit more.

Heat oil on medium heat in a frying pan. Once the oil is hot pour in the egg mixture, tilting the pan to spread the egg mixture in a circle to cover the base of the pan. 

As the omelette sets use a heatproof plastic spatula to gently lift the edges. At this point depending the type of frying pan you are using you may have to lower your heat. I have a ceramic coated frying pan that cooks best on low heat. Raise or lower heat according to the kind of pan you are cooking with. Occasionally you can tilt the pan so that the liquid runs off the top and cooks. Cook until the base is set and light golden and the top is almost set. The top should remain slightly liquid. Once folded over the residual heat will finish cooking it.

Sprinkle your cheese over the top and using your heatproof spatula fold the omelette in half. cook for a couple seconds more then transfer to a large plate and cut into four pieces. Serve with watercress, pommerac and choi sum flowers.


Sunday, June 2, 2013

Caribbean Smashed Potatoes


I'm here to talk about smashing stuff.

Can I confess that more often than not I arrive home in a mood that is more conducive to smashing things, rather than preparing dinner.

These potatoes are two thumbs up, high five, secret handshake delicious AND they have the added bonus of giving you an outlet for burning off some of the day's stress.
.
Here is how you go about pretending that you are crushing your boss' giant potato head making these smashing good potatoes.

SMASHED POTATOES

Ingredients
12 potatoes (small to medium sized potatoes)
2  tsps kosher salt (or more to taste)
1/2 cup vegetable oil
Herbs (* you can pretty much use any of your favourite herb blends. Fresh rosemary is nice. Herbs de Provence or Italian herbs are great too. Here I have used green seasoning which is a staple in every Trinidadian's kitchen.

METHOD
Boil your potatoes in water salted with 1 tsp of salt. Cook the potatoes until they are tender. Check that the centers are cooked through by piercing with a fork or bamboo skewer.

Preheat your oven to 450°F

Drain the potatoes.  Brush a large baking tray with oil. 

Use a potato smasher to pulverize those puppies.


Brush the smashed potatoes with oil. 

Be generous. 

Sprinkle with your favourite blend of herbs. 

Sprinkle with 1 teaspoon kosher or a coarse grained sea salt. The larger grains cling to the crispy skins just a little bit better than table salt. 


Roast potatoes in the oven at 450°F until they are crispy. This should take about 30 minutes.


Cooks Tip: You can do the prep work - boiling and flattening the potatoes- the night before. Then all you have to do the next day is cover them with oil, herbs and salt before roasting them.


As a final note I'd like to make mention that I am very honoured to have been featured in this month's newsletter of Simply Trini Cooking. Click the link to head on over to the website and subscribe to get your free copy. I wonder if you can guess which one of my recipes is being showcased?

Thursday, March 28, 2013

Jamaican Red Snapper Stew - Photo Update

Fish becomes the star ingredient in many Trinidadian homes during the season of Lent. Tomorrow being Good Friday we will be having Fish Broth. While planning for that I was reminded of the meal in the picture below. I was never satisfied with my initial images of this dish so I retook the photo. As you can see from the date I forgot all about posting it. Better late than never, I guess. The recipe can be found here


Tuesday, November 6, 2012

Modak ( Steamed, Coconut Dhal Dumplings)


Divali is nearly upon us and my mind is already on the food, especially sweets. This one is a sweet, steamed, rice dumpling from the South of India. Modaks are usually made for the festival of Ganesh Chaturthi in honour of Lord Ganesh. While not a Divali sweet per say, it was just too tempting to pass up.


Traditionally modaks are filled with with coconut, jaggery (unrefined brown sugar) and spices. However modern versions use a staggering variety of fillings. I have come across everything from mango modaks, to ones filled with raspberry coulis. There are even chocolate modaks. I love that it is a dessert which can be customized to just about everyone's taste.

For my first go at it, I decided to start with a more traditional version. Most people use modak molds to obtain a pretty fluted shape. It is possible to form the pleats by hand. if you are so skilled. Clearly I am not. I gave it the old college try but people I have a day job that I won't be quitting anytime soon. 

The lady in this video gives a good explanation of the pleating process at about 3.33 mins into the video.


The little red dots on top of my modaks are not traditional but if I were making these with different fillings, then different coloured dots would be an easy way to remember the stuffing of each dumpling. Plus it makes my sad looking, little, dumpling balls look just that more festive - or so I tell myself. A small amount of self delusion is quite healthy, isn't it? 


The reality is that working with any kind of dough takes practice as you need to develop a feel for it. Clearly, I need more practice to get a smoother dough. Luckily, these little dumplings are such a treat that making them over, and over, and over again, in order to perfect my technique will not be a hardship.


Modak (Coconut Dhal Dumplings )
Makes 24 modaks

For the dumpling
2 cups rice flour *
2 1/2 cups water
1 tsp vegetable oil
1 tsp white sugar
1/8 tsp salt

For the Filling
1 cup dried yellow split peas
3 1/2 cups water
1 cup sugar
1 cup grated coconut
1/4 tsp salt
1/4 tsp cardamon
1/2 tsp freshly grated ginger


Method

Filling
1. Cook split peas in pressure cooker with 3 cups of water. Bring pressure to high then cook for 10 mins

2. Mash peas with a wooden spoon. Mix in the grated coconut  and set aside.

3. In a saucepan dissolve one cup of sugar with half cup of sugar and cook for a few minutes until you have a thin syrup.

Add the syrup to the peas and coconut mixture. To this add salt, cardamon, and ginger.

4. Return to the stove over a medium high heat. Cook for a few minutes tirring constantly until mixture has thickened, is no longer watery and can be shaped into small balls.

Dumpling

Place rice in a mixing bowl. In a saucepan, bring to a boil  2 1/2 cups water, sugar  salt, and oil.  Slowing pour over rice flour while mixing with a wooden spoon to form a soft dough.

Grease your hands and have a small bowl of water nearby to wet your hands if needed to help maintain a good dough consistency. Make lemon sized balls and flatten to make a small cup place the coconut/dhal filling in the cup. Wrap and seal dough around the filling. Set aside and cover with a damp cloth while you shape the other modaks. Steam in a steamer for 10 - 12 minutes


Cooks Notes
*I could not find rice flour so I used a plain white gluten free flour blend that had rice flour listed as one of its ingredients.


Wednesday, October 26, 2011

Burfi (Indian Milk Fudge)

burfi

Divali (Diwali) is one of the most eagerly anticipated holidays of my country. Yesterday my son came home from his Catholic School with his painted clay deya (a small, clay, lamp) eager to light it right away. Great was his disappointment when I explained that he needed to wait until the the next day.

Divali is a Hindu festival but in Trinidad and Tobago it is embraced and enjoyed by everyone. Indeed there is universal appeal in Divali's central theme which is light over darkness, or good conquering evil.

barfi

Luckily for me, my father-in-law is Hindu so Divali also means that I get a day off from the kitchen. On this day, I defer to my mother-in-law's expertise in the preparation of a fabulous, vegetarian, buffet of traditional dishes. Yet another reason for me to love this holiday. By the way, my mother-in-law is Catholic and anyone other that a Trinidadian would probably find it strange to be in a home where a picture of the Sacred Heart of Jesus hangs next to a picture of Lakshmi Mata (the four armed Hindu Goddess of material and spiritual wealth). Just wait until we get to Christmas and the Muslim cousins start putting up their Christmas tree:-) All perfectly normal for a Trinidadian.

burfi


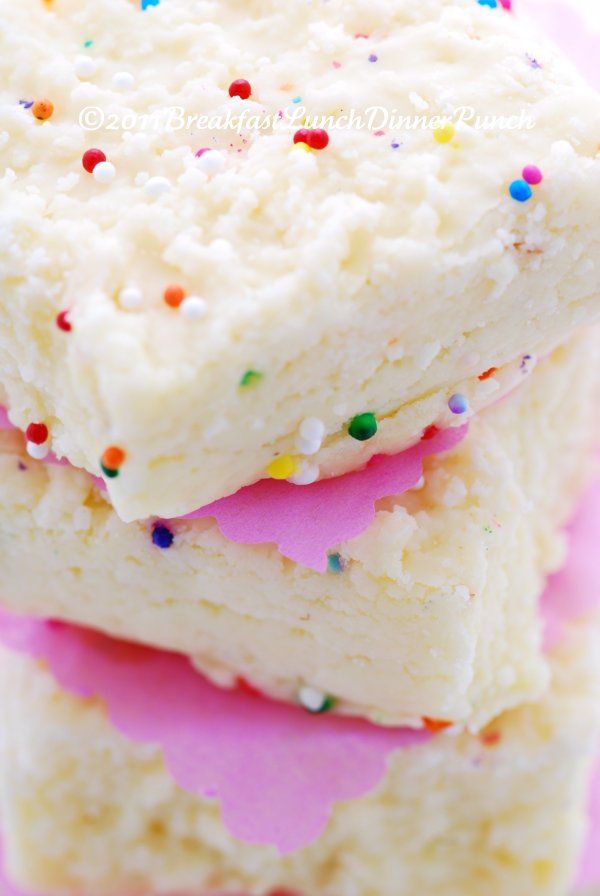
Aside from the food, the other highlight of Divali is the lighting of deyas. After sundown people often take walks or drive to the various villages to see the fantastic lighted bamboo displays and to partake of the food and sweets prepared by their Hindu family and friends. Barfi is a milk fudge that is a popular Diwali sweet. It is fairly easy to prepare.

Burfi 
Makes 30

Ingredients

  • 4 cups full cream milk powder 
  • 1 cup double cream
  • 1 1/2 cups granulated sugar 
  • 3/4 cup water
  • 1 tsp rose water
  • 2 pieces fresh ginger (each about 1/2" x 1/2")
  • 1/4 tsp ground cardamom 
  • coloured sprinkles
  • butter for greasing dish.


Method
Mix the powdered milk and cream until it forms fine crumbs.
Sift the mixture through a seive.
Prepare a pyrex dish by greasing it and lightly cover bottom of dish with sprinkles.
Boil sugar, water rose water and ginger approx 10 minutes just before the sugar spins a thread. Remove the ginger.
Stir syrup into the milk mixture and combine well.
Press mixtue firmly into greased dish. Decorate the top with more sprinkles and cut into squares when cool.

Sunday, September 25, 2011

Breadfruit Oil Down

breadfruit oil down
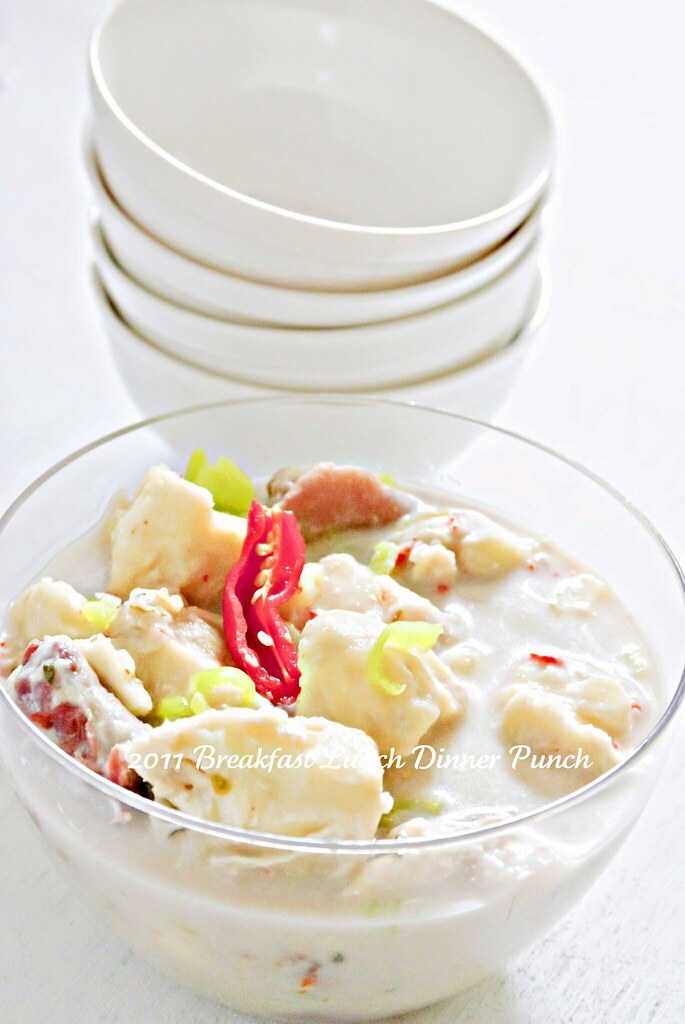
Oil down (Oil dong) is a traditional Caribbean way of cooking starchy vegetables in a coconut milk reduction. Jamaicans call it run down. In Trinidad the most popular oil down ingredient is breadfruit which technically is a fruit but for cooking purposes it is treated like a vegetable. Because the breadfruit is sweet and buttery the accompanying meat tends to be a bit of something briny like salted cod or salted pig tails. Sometimes callaloo leaves are used along with a colouring agent like roucou or tumeric. This is an simple but filling one-pot meal that doesn’t require require a ton of dishes as everything simmers together in one pot until the breadfruit and meat are cooked through. The meat can be omitted for a vegan / vegetarian alternative.

Breadfruit Oil Down
1 1/2 lbs salted meat (beef, or, pig tails, etc)
1 small onion, chopped
3 cloves garlic, crushed
Leaves scraped from 1 sprig thyme
2 tbsp chopped chive
5 small seasoning peppers, or mild green chilli, finely chopped
2 tabpspoons vegetable oil, for frying
1 med breadfruit (2-3 lbs), peeled, core removed
4 cups coconut milk
3 seasoning peppers, finely chopped

METHOD
Put salted meat or cod into a pot with water. Bring to a boil and drain, repeat three times to remove salt. Cook until almost tender. Drain. Sauté onions and garlic in hot oil until onions are translucent. Add chive, thyme and salted meat, breadfruit, peppers and 4 cups coconut milk. Add salt to taste. Cover pot and bring to a boil.  Reduce heat and simmer for about 45 minutes until breadfruit is cooked and tender.  Dish is done when liquid is almost absorbed and breadfruit looks somewhat mushy. I like more of a sauce with  my breadfruit so I usually remove it from the heat sooner than the 45 minutes.
Photobucket

Monday, August 1, 2011

Avocado Tostadas

avocado black  bean tostados

It's been raining avocados.

Last week a man we barely know gifted us with a huge bag of these pears. Unfortunately he ran off before I could marry him.

Most unfortunate agreed my husband.

Almost everyday for the last month someone (bless 'em) has given us an avocado and I've been eating slices of buttery pears daily. A thick, crusty, hops bread with a smash of avocado in between is considered a good meal by me.

There is something about being on vacation that makes me want to avoid the kitchen. Meal preparation is decidedly very low key these days and luckily I have avocados to thank for that. You can prepare some very filling, no-cooking-required dinners with avocados.

Leaving me with more time for reading books, watching re-runs of House....and my all time new favourite  obsession Pinterest which I use to search out recipes of people who are spending more time in their kitchens - go figure.


Avocado Tostadas
(serves 4)
Ingredients

1 ripe avocado
8  tostada shells (from the supermarket)
Black bean, Corn salad with Lime Vinaigrette (recipe here)

Method.
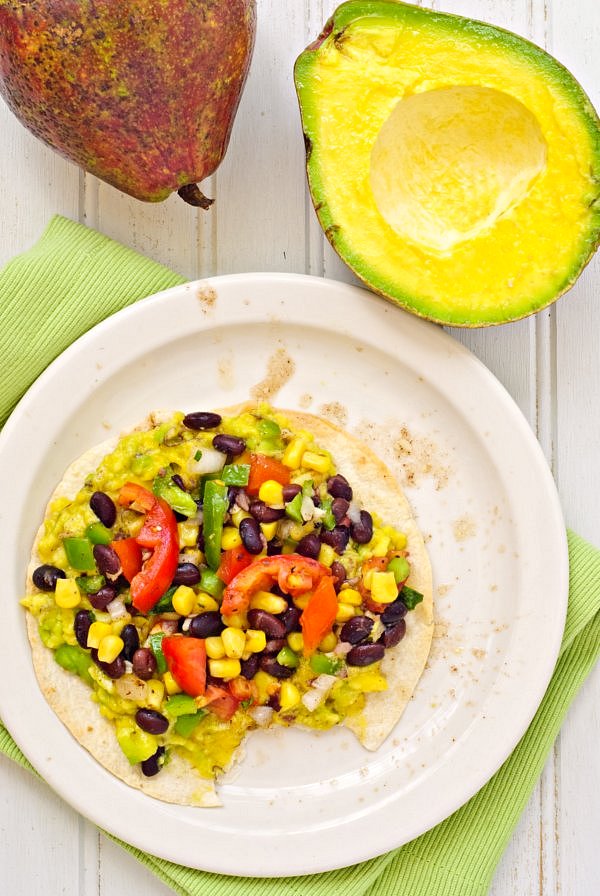
Make salad the night before. Warm tostadas for about 7 mins in a 350 degree oven. Slice avocado and smash with a fork. A lumpy mash is just fine. Spread on to the tostadas. Top with black bean salad. Serve with a tall glass of frosty, cold, lime juice.


Photobucket

Saturday, July 23, 2011

Sweet and Sour Thai Shrimp

Sweet and Sour Thai Shrimp

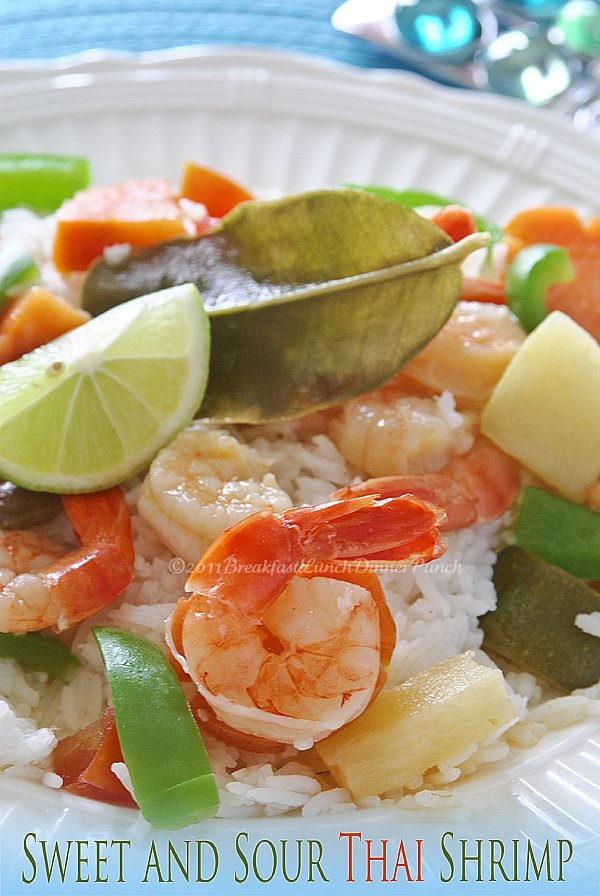
This is a quick stir-fry recipe which takes on the character of a stew with a satisfying broth at the end. As long as you chop all your vegetables the night before it only takes 10 minutes to cook the following day.

This is nothing like a Chinese sweet and sour recipe. The aromatic kaffir leaves and coconut milk  give this dish an authentic Thai flavour. That said, Kaffir leaves are a speciality item and when I run out of them I have already decided that a quick trip to my patio for some freshly cut lemongrass (locally called fevergrass) will suffice until my next trip to the gourmet shop.


Sweet and Sour Thai shrimp
recipe adapted from here

Prep Time: 20 minutes
Cook Time: 10 minutes
Total Time: 30 minutes

Ingredients:

SERVES 4
3/4 lb. shrimp  (shells left on or removed )
MARINADE: 1 Tbsp. oyster sauce + 1 tsp. brown sugar

1-2 Tbsp vegetable oil
4 cloves garlic, minced
1 thumb-size piece ginger, grated or sliced up fine
6 Tbsp. dry white wine or white vinegar
1/2 carrot, sliced
1 green bell pepper, sliced
4 kaffir lime leaves
1 tomato, diced
1/2 cup coconut milk
3 Tbsp. honey
2 Tbsp. lime juice
4 Tbsp oyster sauce
1 to 1 ½ cups pineapple chunks, fresh or canned
1 1/2. corn starch dissolved in 3 Tbsp. water


Preparation:

Combine marinade ingredients and pour over the shrimp. Toss to coat and set aside.

Place 1-2 Tbsp. oil in a wok or large frying pan over medium-high heat. Stir-fry the garlic and ginger 1-2 minutes. Add a little wine or vinegar.

Add the carrot and stir fry until tender. Add the green pepper and stir-fry 1 minute. Add wine or vinegar as needed to keep ingredients frying nicely.

Reduce heat to medium. Add the lime leaves, tomato, coconut milk, honey, lime juice, oyster sauce sauce. Stir well to combine.

Add the shrimp and pineapple chunks. Simmer 4-5 minutes, stirring occasionally, until shrimp are pink and plump.

Add the cornstarch dissolved in water and stir well. Simmer 1 more minute, or until the sauce has thickened.

Taste-test the dish, adding more honey (or brown sugar) if you prefer it sweeter. If you prefer more of a tang add more lime juice or vinegar


Photobucket

Saturday, May 7, 2011

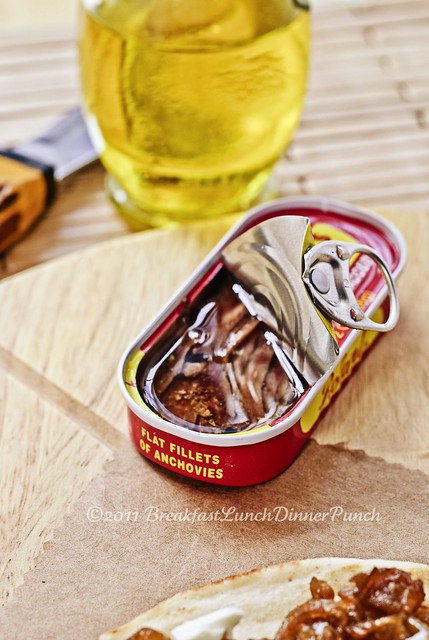
A Green Eggs and Ham moment...Anchovies and Pissaladière

anchovy tin


I know right. Last week surely you thought I was nuts to stand in front of a stove for an hour sweating onions. Here I am this week extolling the flavour of fish and onions on pizza.

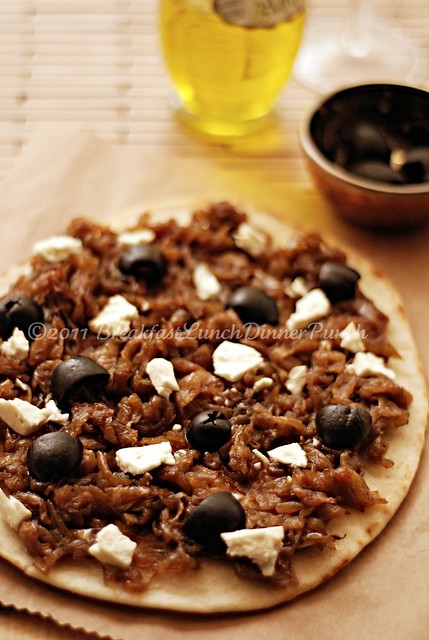
Pissaladière is a wonderful pizza-like dish from the south of France. I don't caramelize onions often, once maybe twice a year but when I do I go all out and do a huge batch. So yeah it was a lot of work but it means that I can come home from work, spread my onions on a pita base and in the 5 minutes that it takes to heat this in the oven, dinner is done. The onions go just as well on a traditional pizza dough base and are just sublime on a pastry base. Whatever. Knock yourself out.

I know for some of you the the idea of fish on a pizza seems strange. Let me tell you that there was a time I thought so too. I hated anchovies which was strange because when I was growing up I never actually saw or even tasted an anchovy. It wasn't something that was available in the stores here. In fact, I've been searching my memory to figure out where I got the idea that anchovies were hateful when truth be told I wasn't sure what anchovies even looked like. Stranger even since I totally love these gruesome looking fry-dry.

My opinion of this much maligned fish changed when my favourite brand of Worcestershire sauce was off the market for a while. I tried other brands and they just couldn't measure up. It was only when I read and compared labels that I discovered that the secret ingredient which distinguished my preferred Worcester from it's failing competitors was non other than the 'dreaded' anchovy!

So last year when tinned anchovies and anchovy paste turned up at my supermarket, I decided to try them. To my very great surprise I found that I was already familiar with the flavour of anchovies since they taste exactly like smoked herring albeit much saltier. However the intense brine of these little fish used sparingly goes perfectly with  those melted sweet onions.

To those who say they do not like anchovies permit me to borrow from the character in Dr. Suess' Green Eggs and Ham and encourage you all to try it in the hopes that you discover that you actually like it. Try it, try it and you may. You may I say!

Right so clearly Seuss says it better. No worries I'll not be quitting my day job any time soon:-)

Fear of anchovies conquered. Next up the pound of black, scary, viscous looking eggplant jam I bought at an Arabic shop.  Tell me is there any food you have a pre-conceived hatred of even though you've never actually tried it?

pissaladiere

Ingredients
Serving Size: 1 person

1/4 cup caramelized onions
1 pita bread (white or whole wheat)
4 olives (cut up)
1 or two anchovy fillets ( torn into small pieces. Very intensely salty so you don't need a lot)
1 or 2 ozs crumble feta (not traditional to pissaladière but a great add in)

Method
Spread onions on the pita base. Sprinkle cheese, onions, and anchovies. Heat in a 350°F oven for 5 mins or under your broiler on low until it's warmed through. That's it. You're done.

Photobucket

Saturday, April 16, 2011

Lemony Sweet Potato 'Fries'

DSC_7647

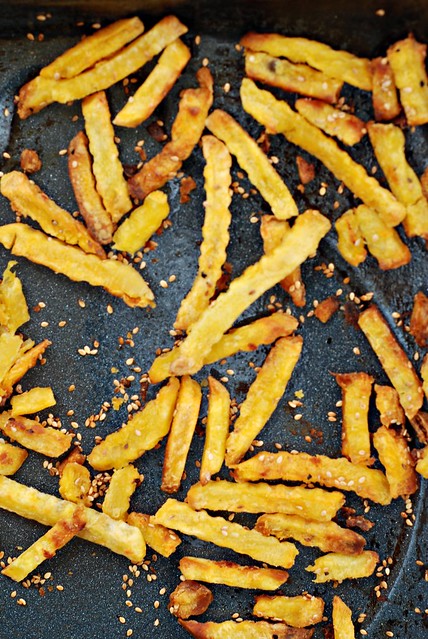
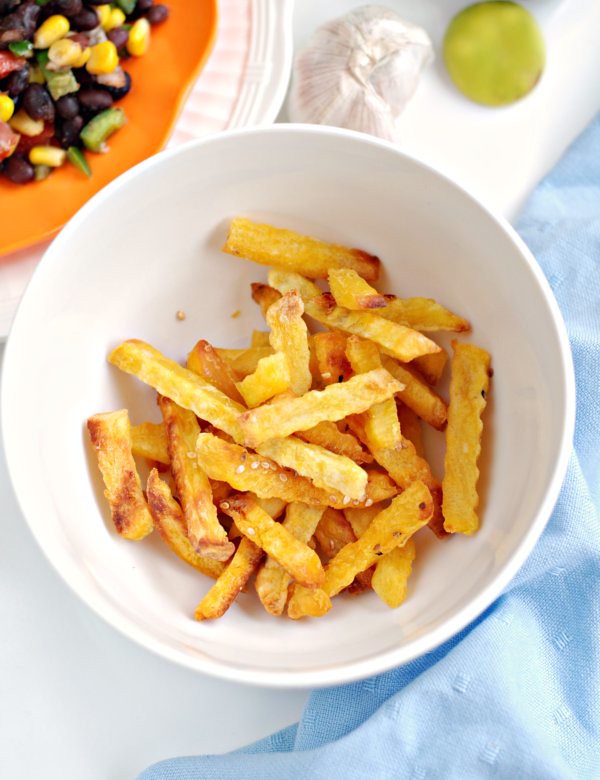
These aren't actually fried but baked and yet they are everything that you just love about fries - only healthier and without the side of guilt. Freshly baked with a sprinkle of salt clinging to their still hot sides you won't be able to restrain yourself.

Because the idea of  peeling and slicing potatoes for a large family is about as exciting to me as watching paint dry, my first attempt at this recipe was with a bag of McCains.
 
Bad news bears.

Although I used a lot of oil and didn't overcrowd the pan they stuck to the foil so badly that I had to scrape them off,  leaving behind a charred mess. The end results were limp, soggy fries that were burnt on the outside and  undercooked on the inside.

As if that wasn't bad enough, I read the ingredients. It's second nature when you have a child with a food intolerance to do so even when the food is naturally gluten free. Once it has been processed chances are there will be additives and in this case there seemed to more stuff in there than the actual potatoes.

Sweet Potatoes, Canola Oil, Sugar, Potato Starch - Modified Contains Less Than 2% or Less of Annatto (color), Corn Starch - Modified, Dehydrated Sweet Potatoes, Dextrin [see above], Extract of Paprika (color), Leavening (Sodium Acid Pyrophosphate, Sodium Bicarbonate), Malt Powder, Malted Barley, Wheat Flour, Dextrose, Maltodextrin, Medium Chain Triglyceride, Molasses, Natural Flavor, Rice Flour, Salt, Sodium Acid Polyphosphate [see above] Added to Maintain Natural Color, Xanthum Gum.

The highlighted ingredients make this food off limits if you are gluten intolerant. Luckily I found local frozen sweet potatoes that contained just one ingredient - sweet potatoes.

West Indian sweet potatoes have a somewhat different flavour than their almost day-glo orange American counterparts. The two most popular varieties aren't orange but yellow and a soft creamy white. Compared to the McCains, the local brand of frozen sweet potatoes produced a superior 'fry' that was lovely and crisp on the outside despite being baked in the oven as opposed to being fried. By themselves these are a lovely snack or they can be served as a side to a main meal.

DSC_7707
Ingredients
2 large sweet potatoes, peeled and cut into fat chips

2 tbsp Taliani extra virgin olive oil with Lemon
2 tbsp sesame seeds
* coarse salt

Method

1. Preheat the oven to 390°F

2. Toss the sweet potatoes in the oil, sesame seeds and salt and roast in the oven for about 15 minutes, until tender within and crisp outside.

Yield: one generous serving